

The following steps are demonstrated on Windows 11 Home.
Interface options may vary slightly depending on your Windows version.
Setting a PIN
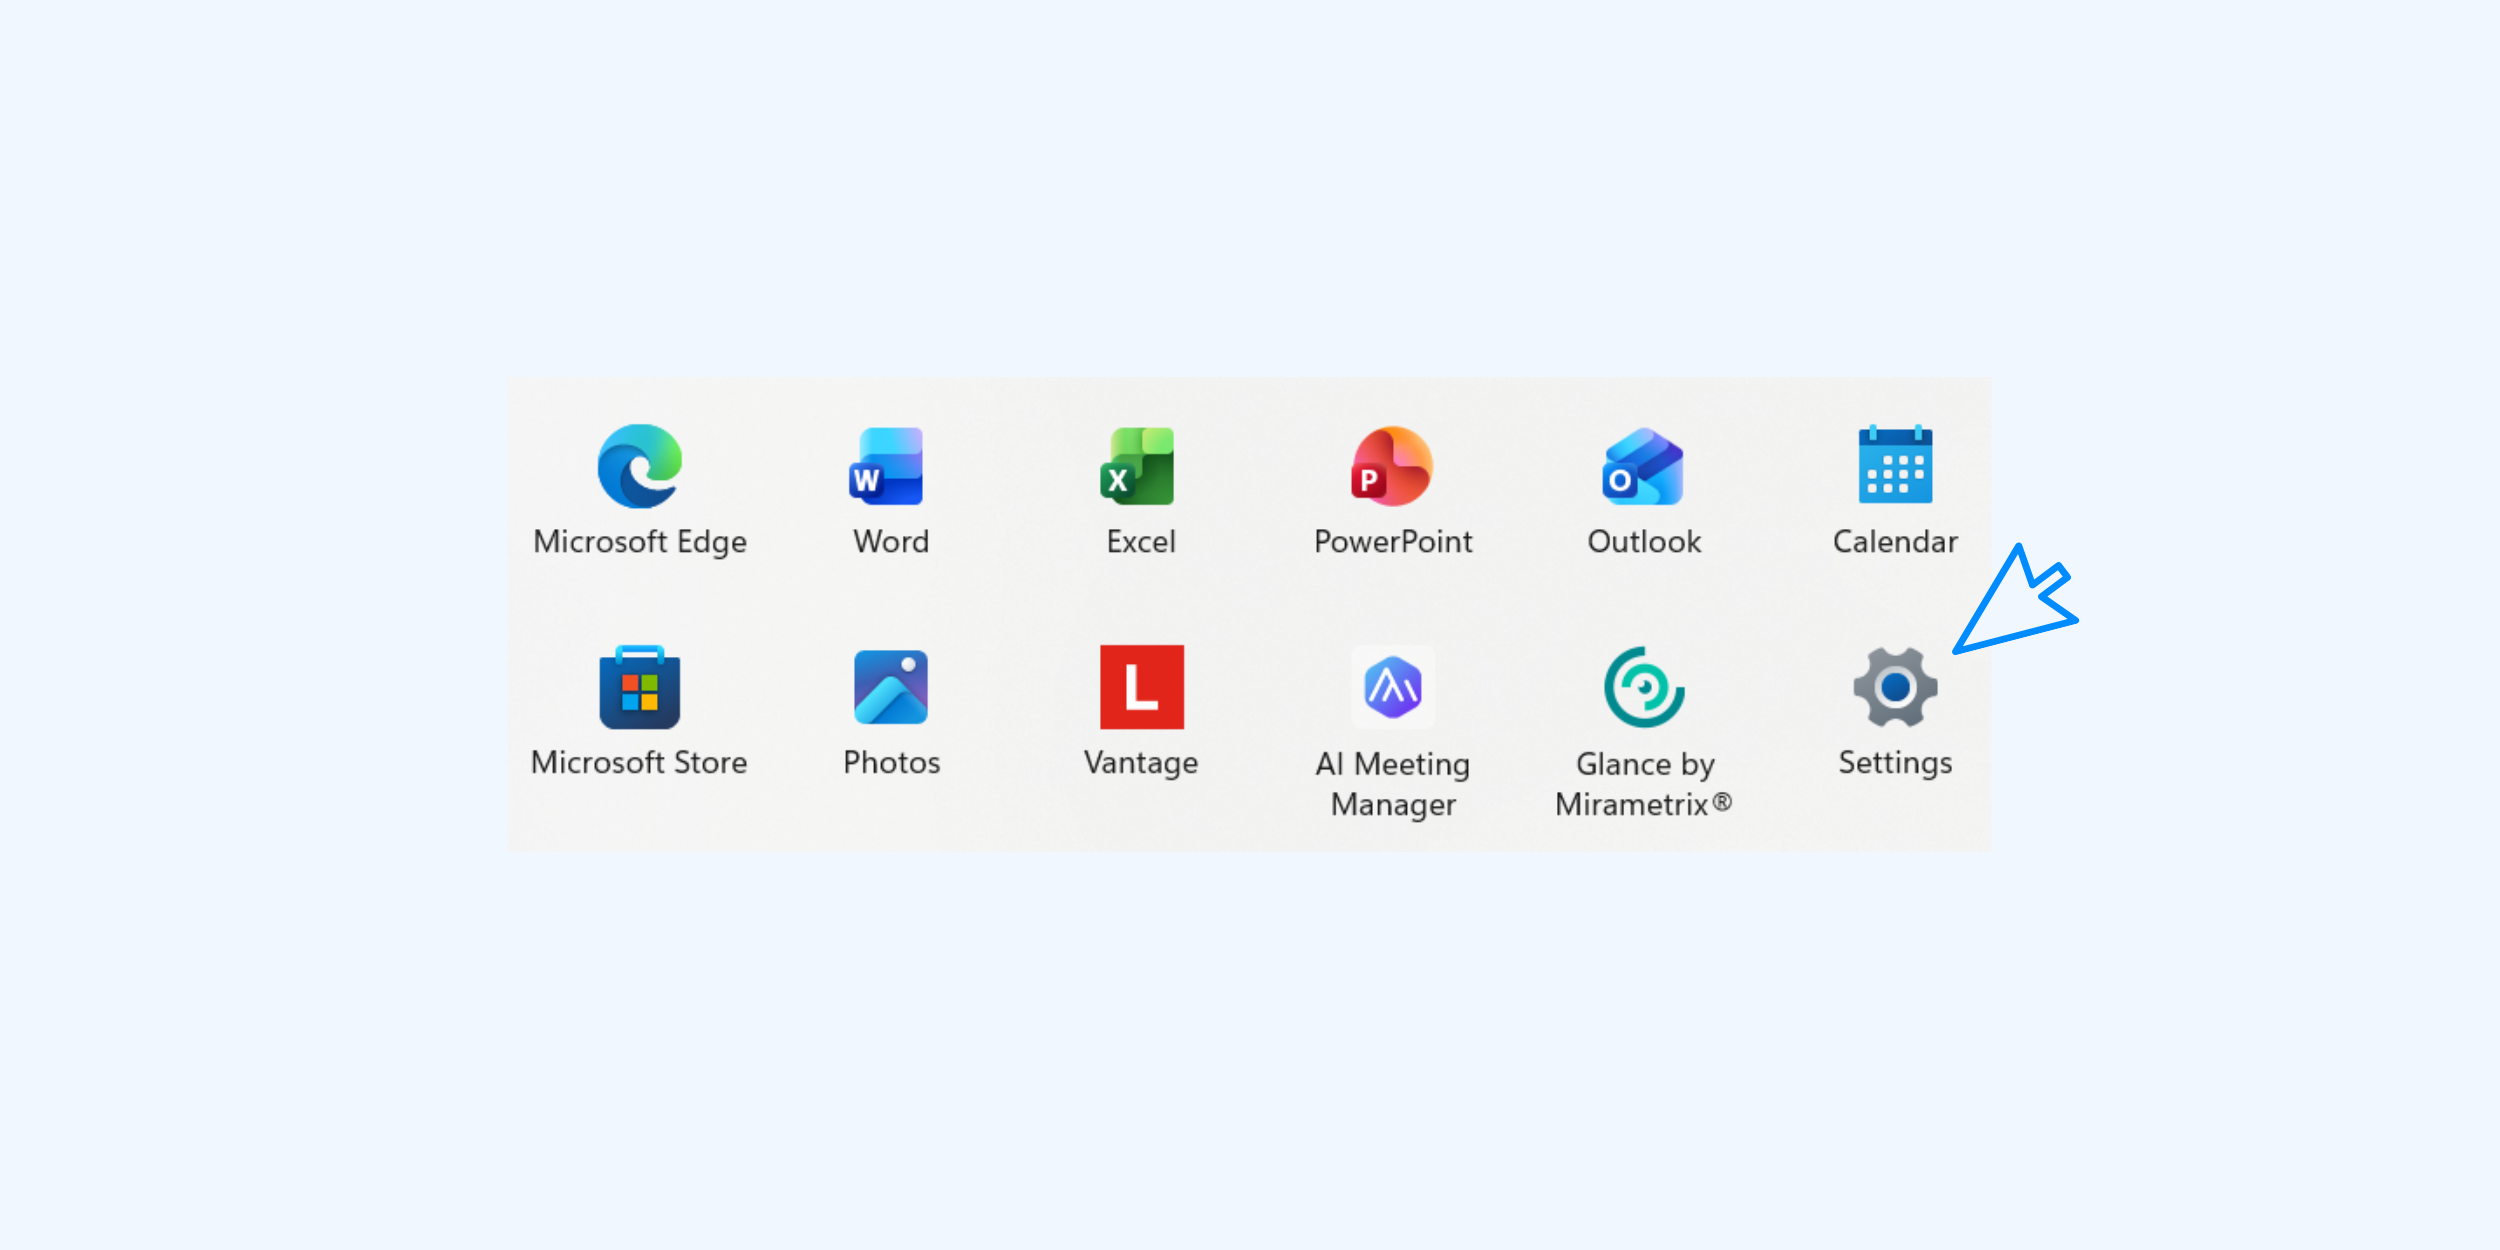
1. Click the Start button on the desktop taskbar

2. Click Settings
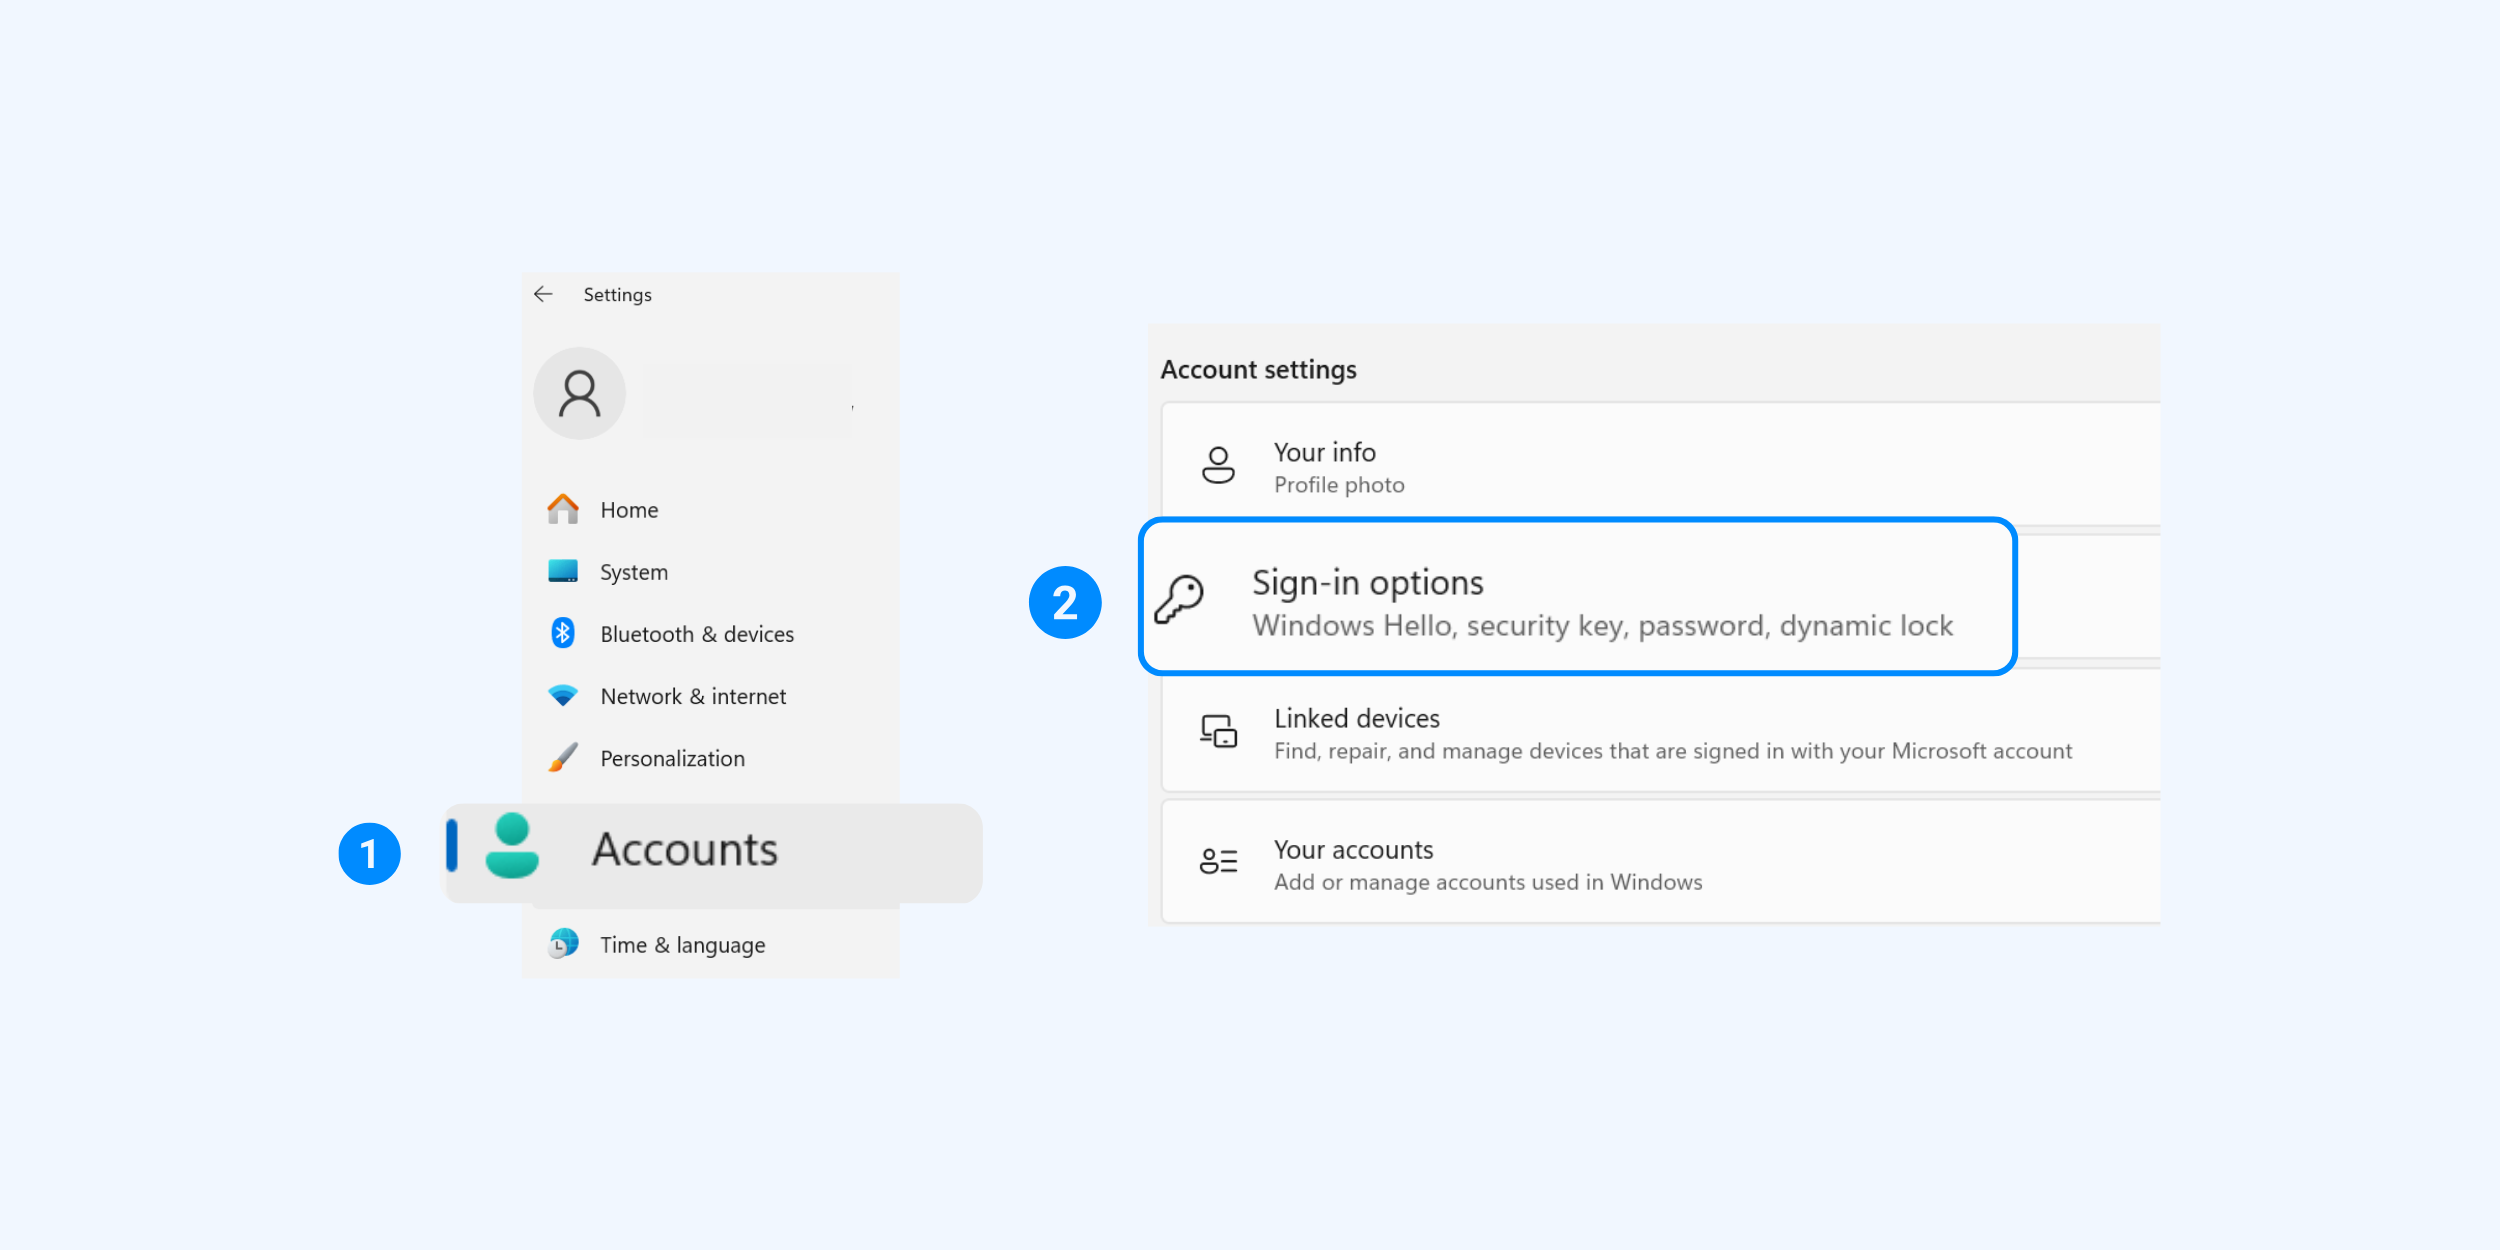
3. Go to Accounts ▸ Sign-in options
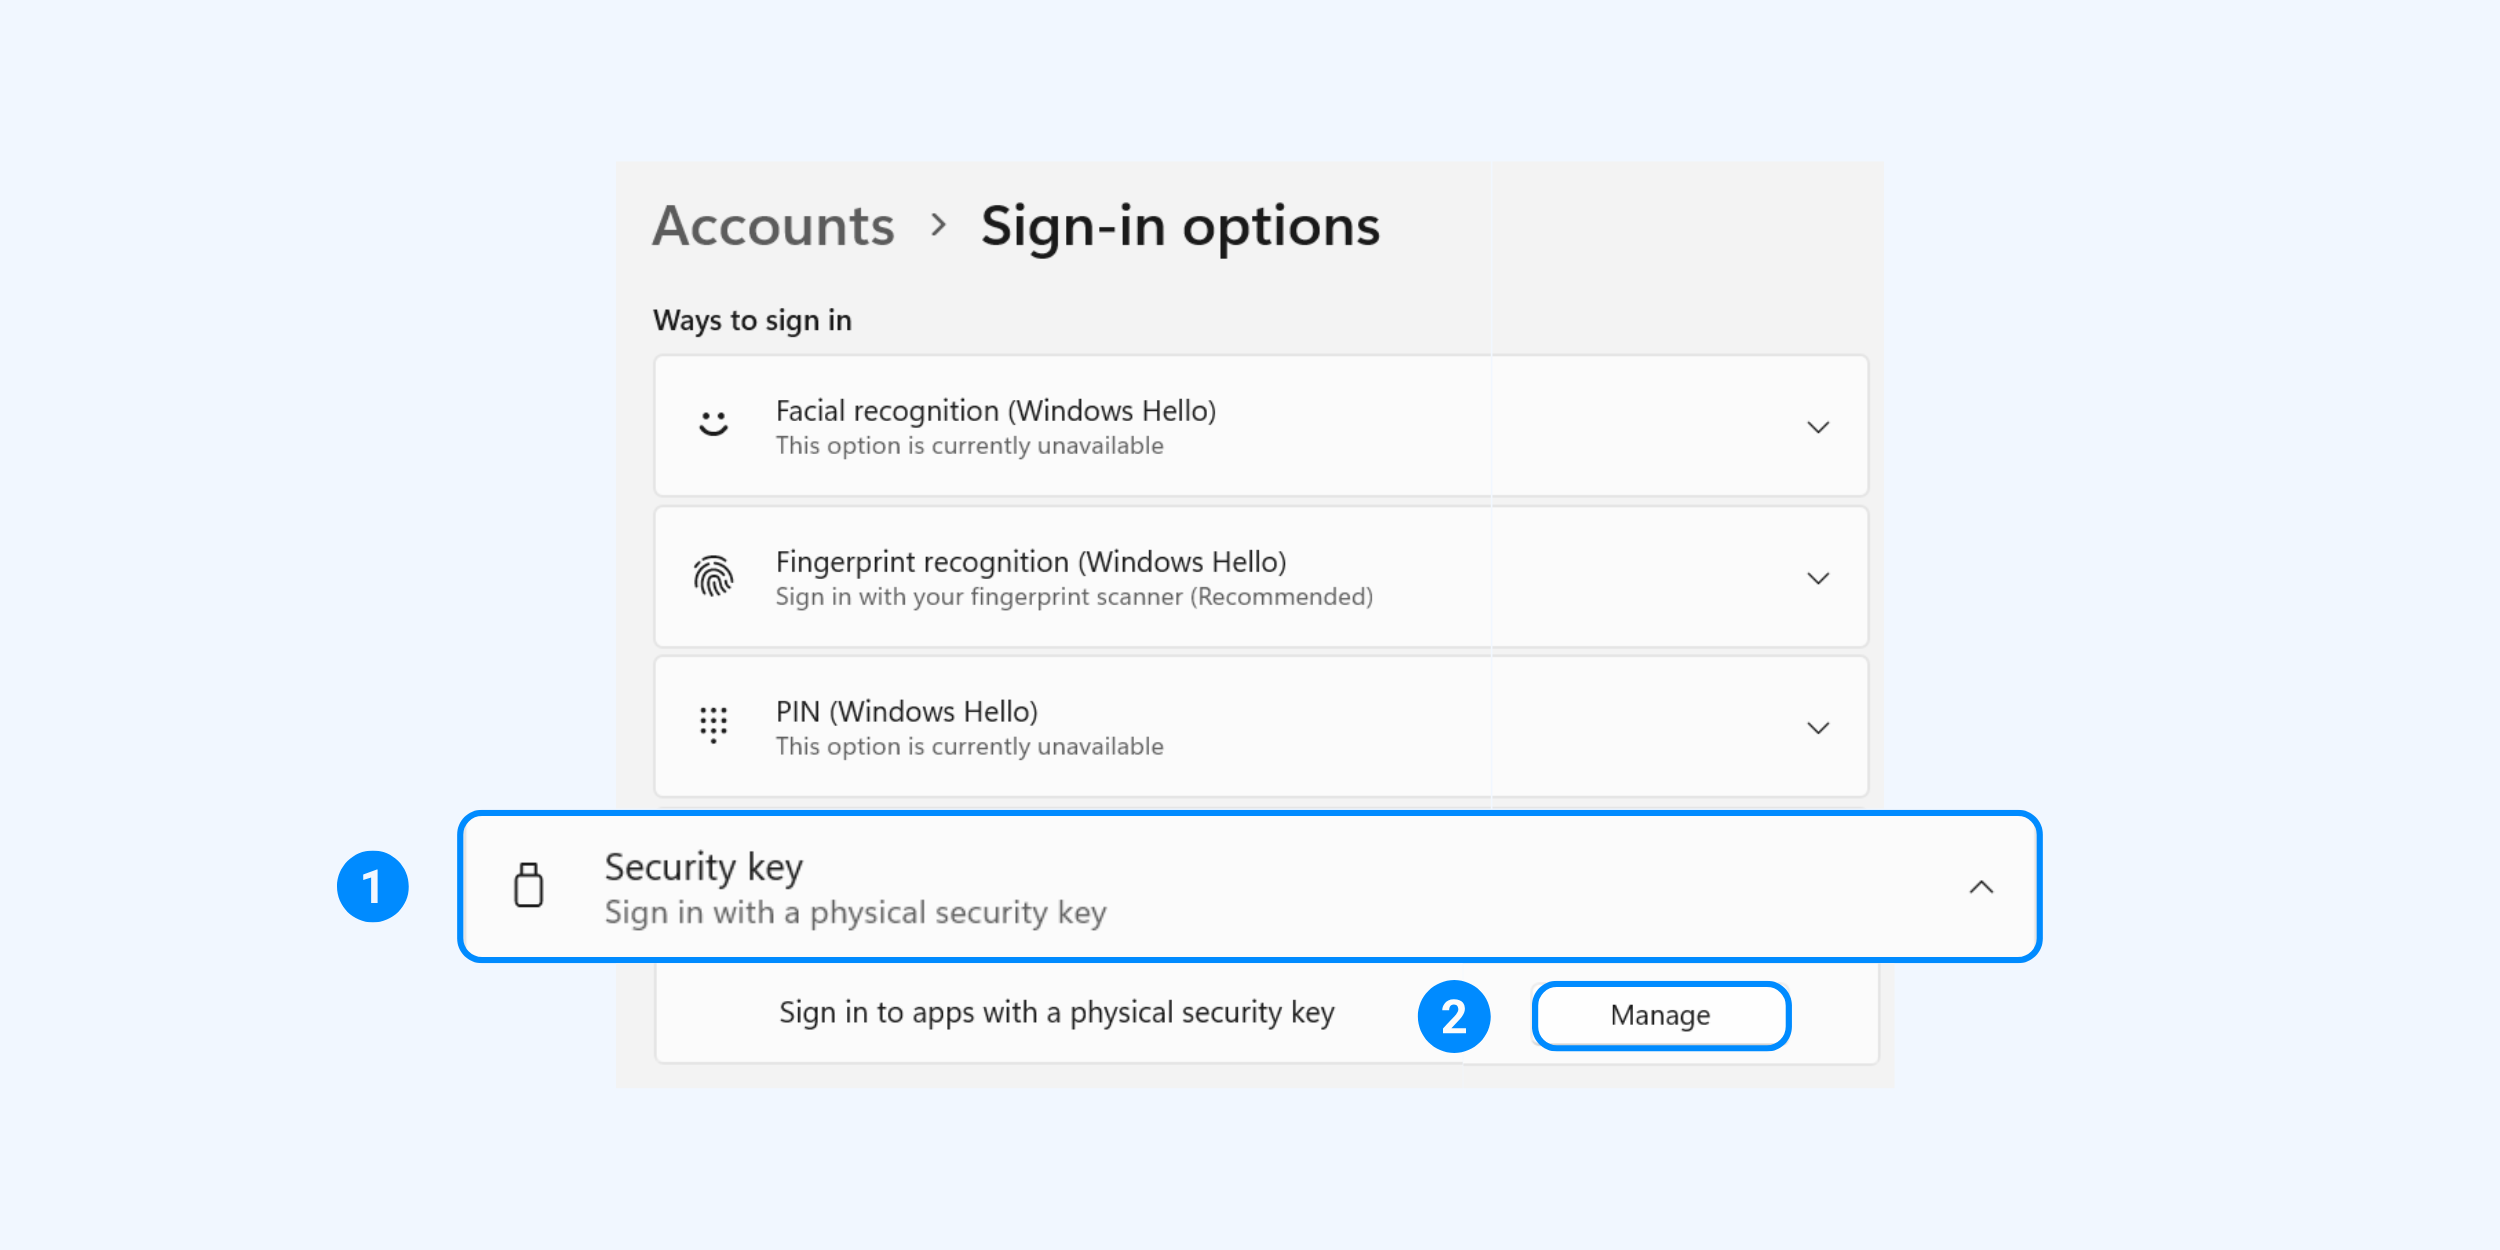
4. Click Security key ▸ Manage
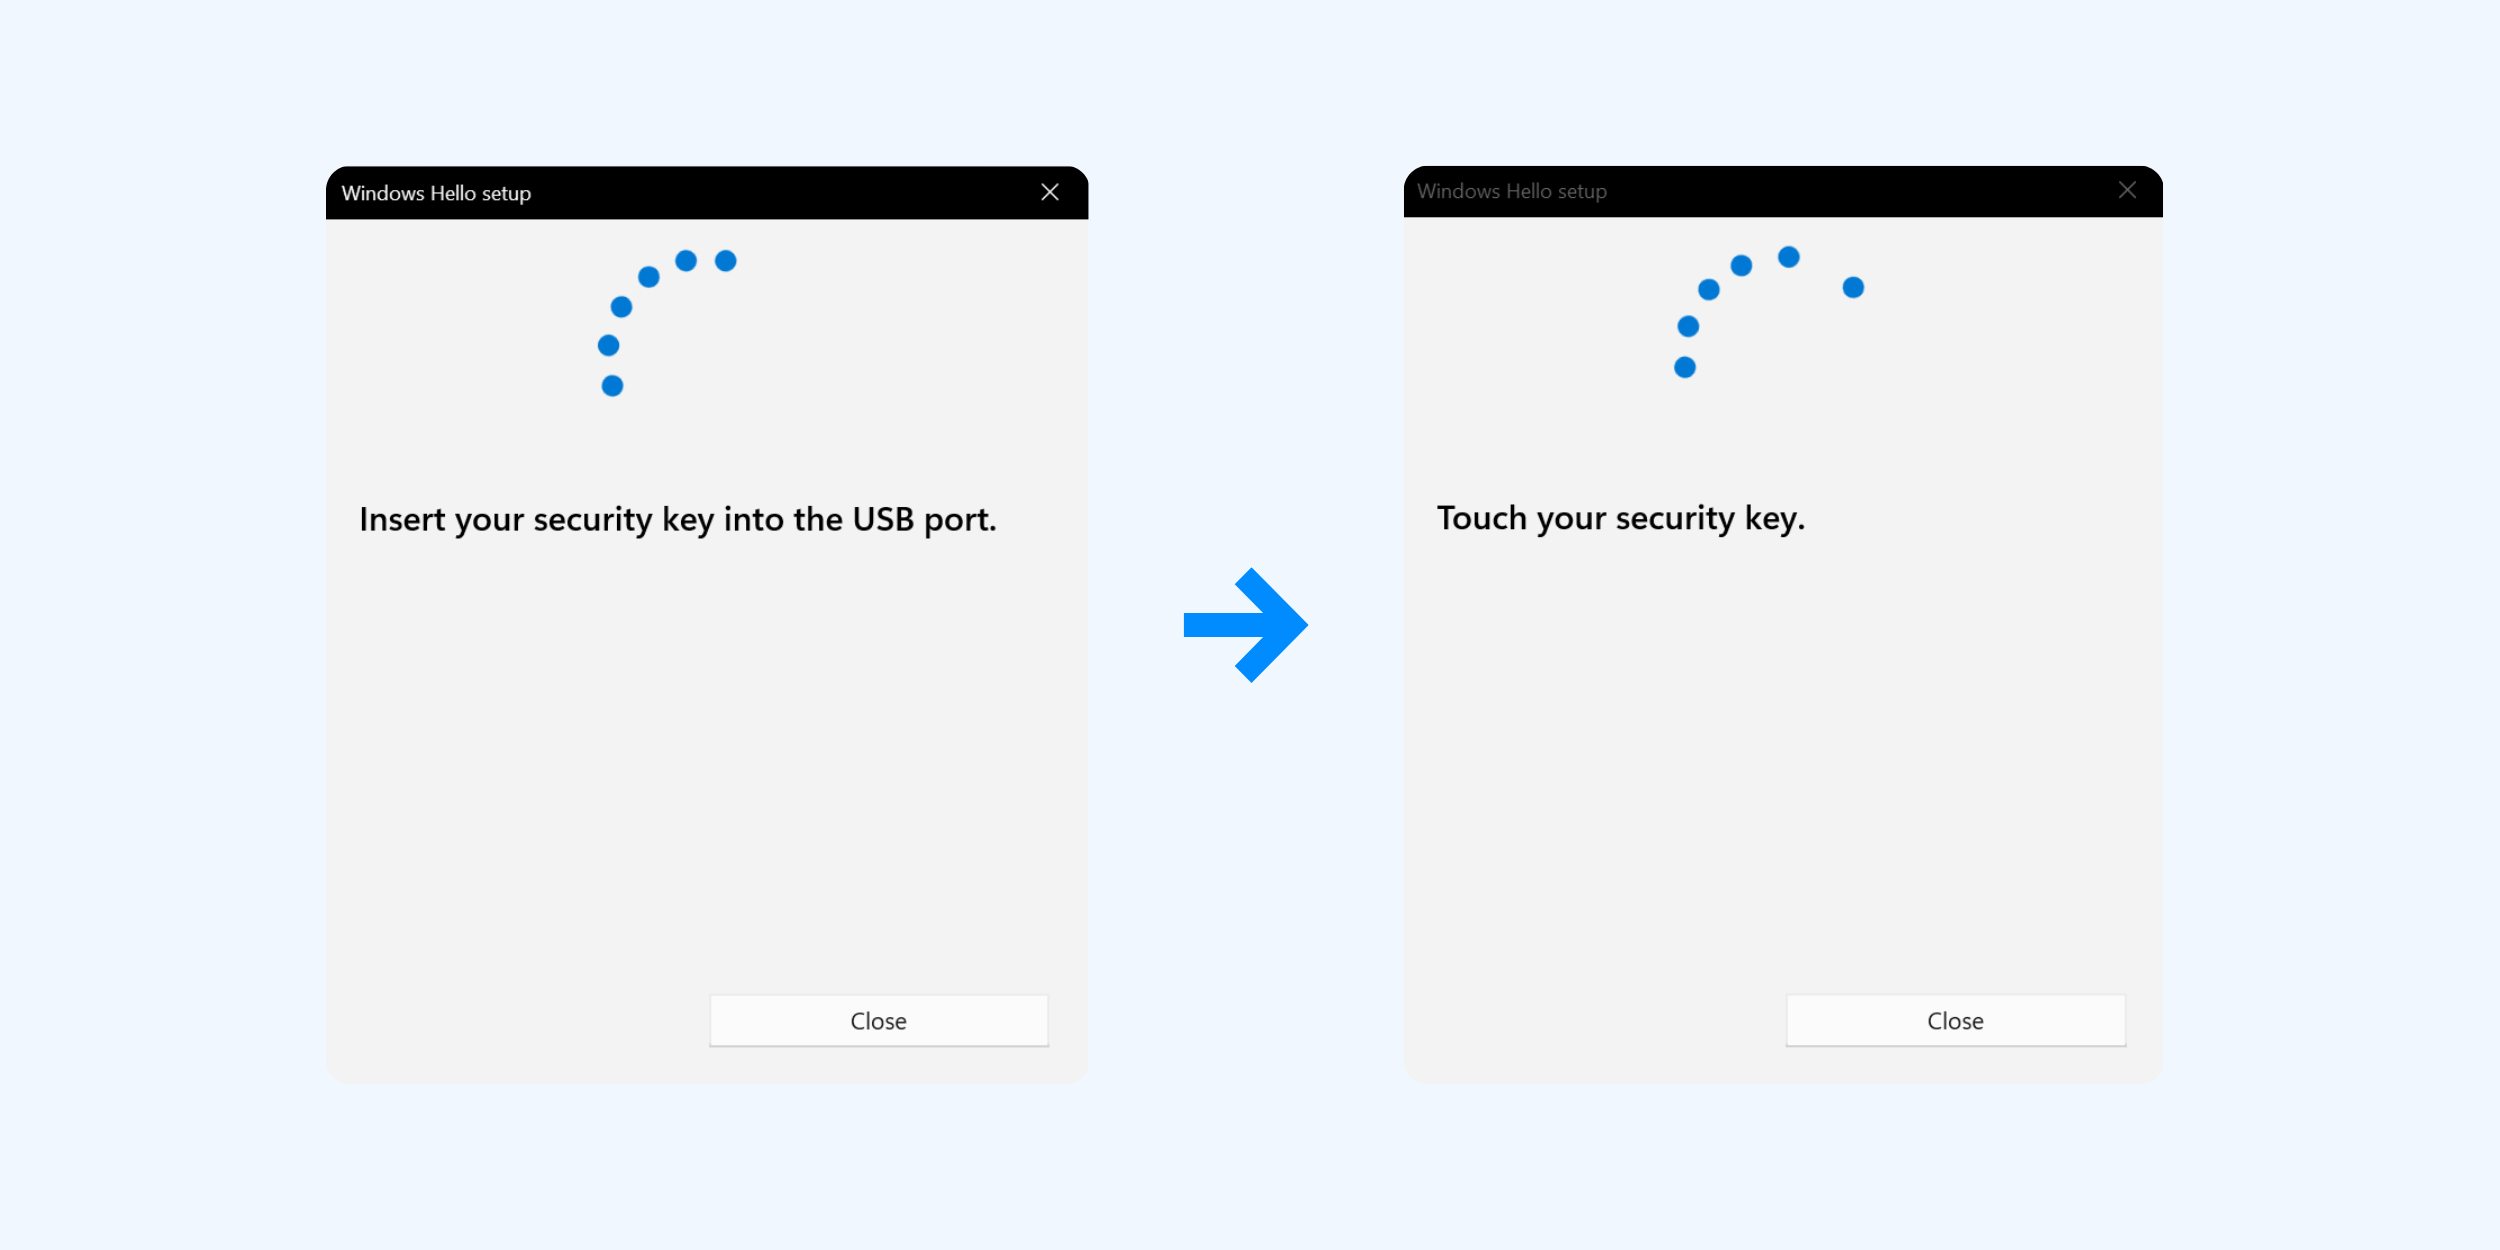
5. Insert your ATLKey. The indicator light will flash and a Windows Hello window will appear — follow the prompts and touch the metal button on the key
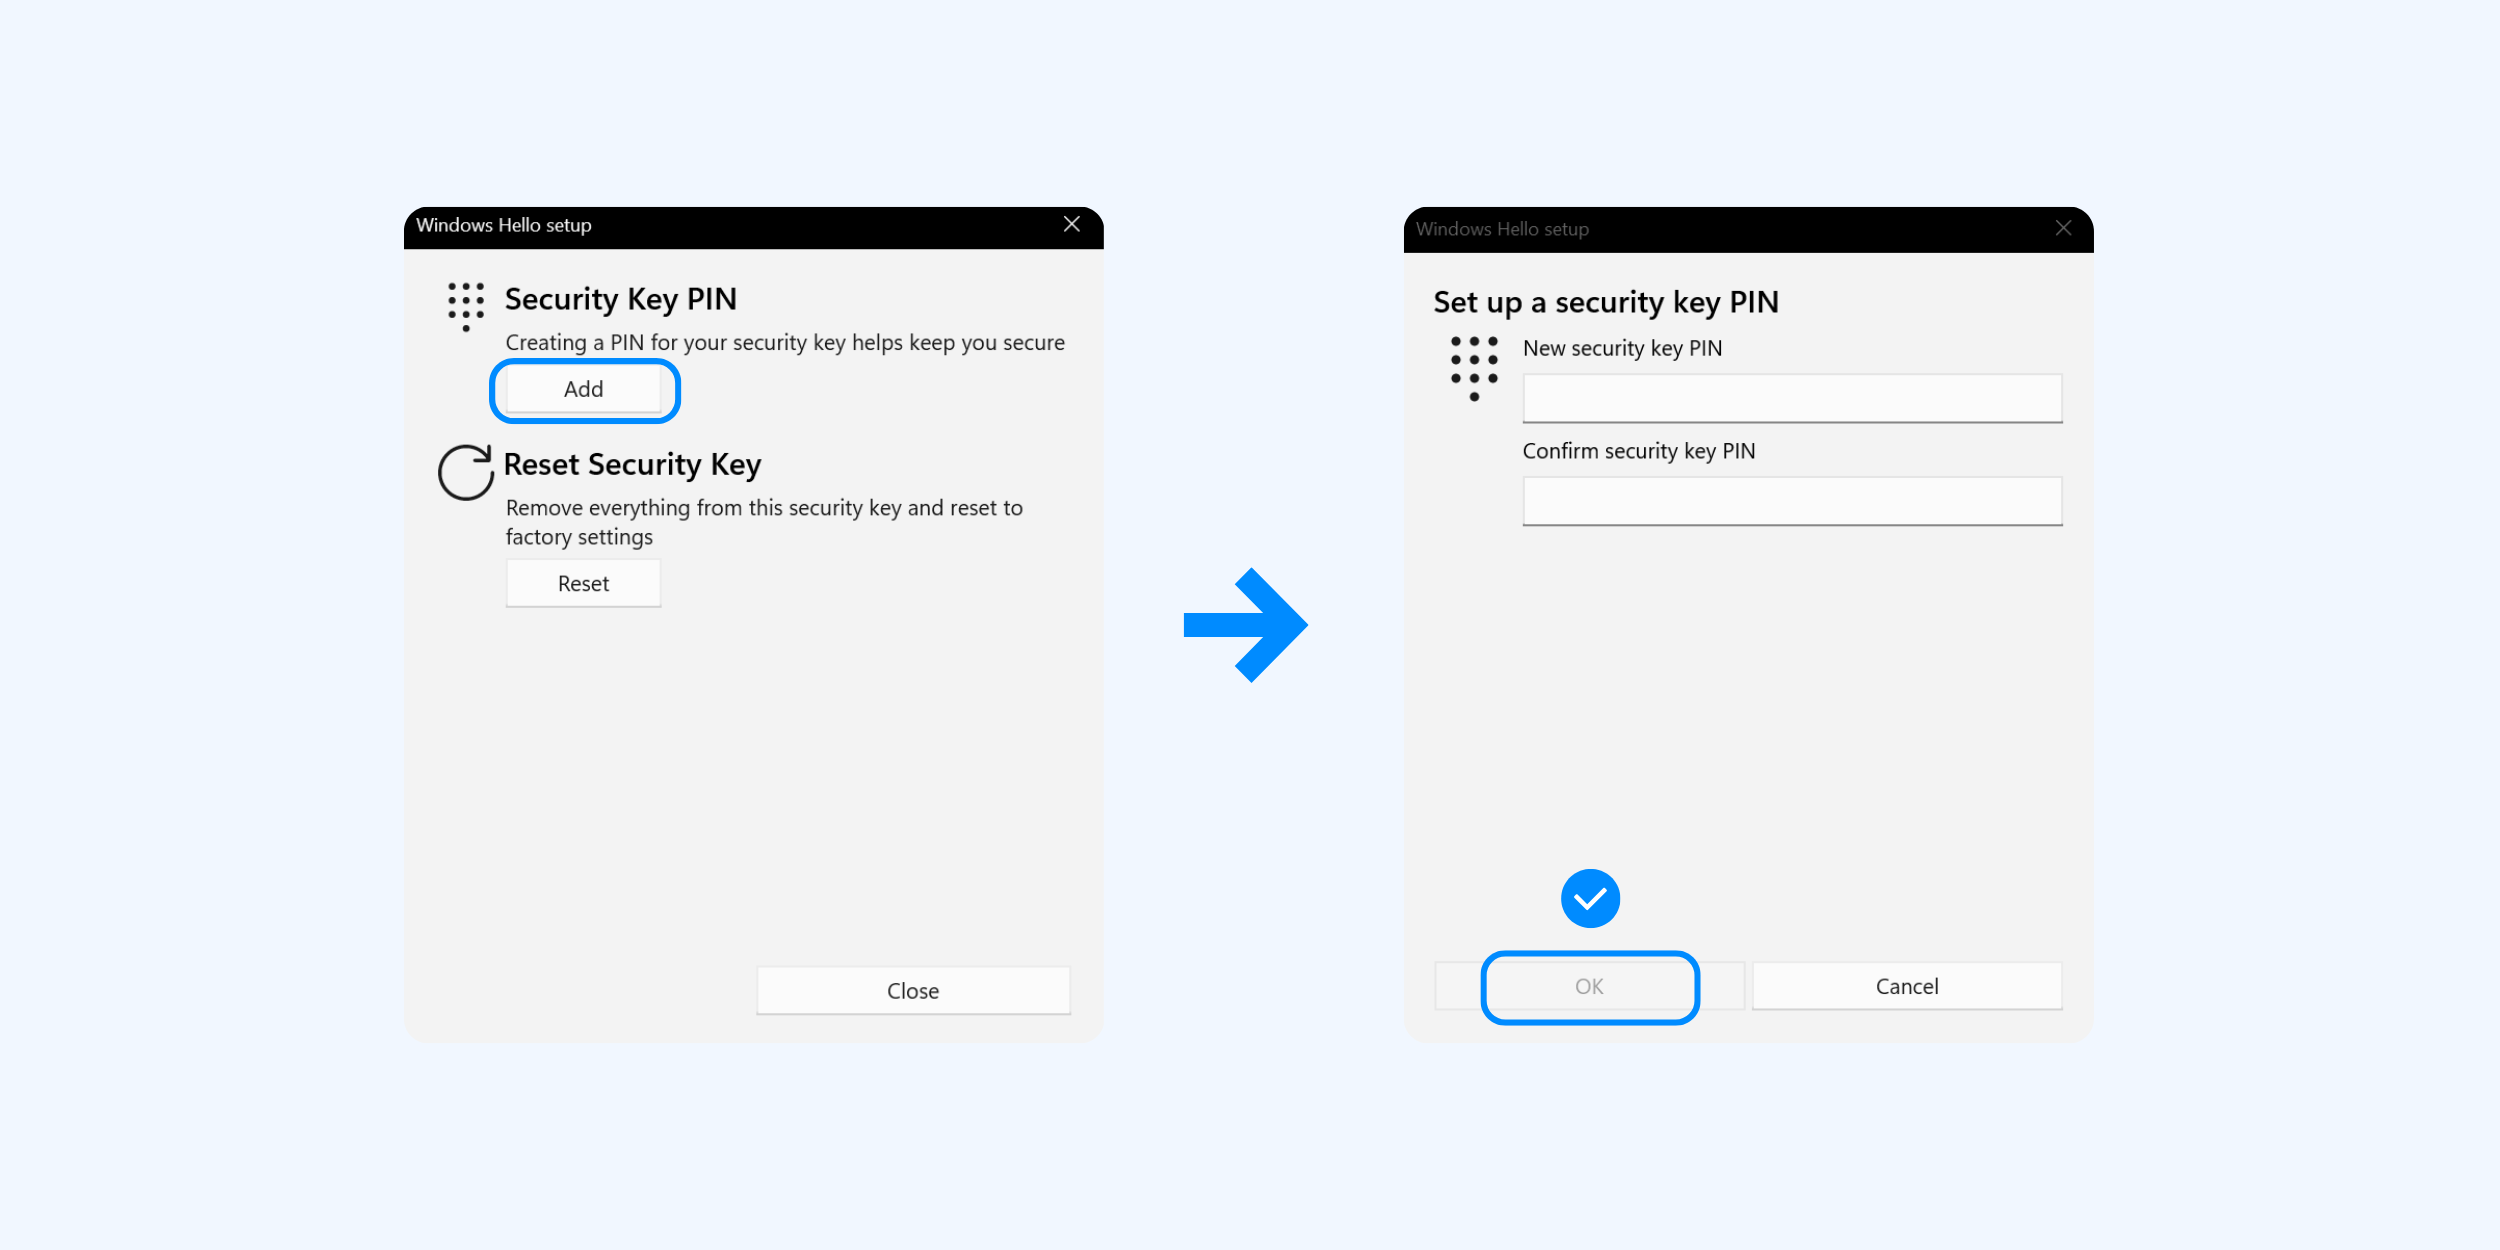
6. Click Add ▸ set a PIN for your security key ▸ click OK to finish
(We recommend 4–63 alphanumeric characters, including uppercase and lowercase letters, numbers, and special characters.)
Changing Your PIN
- Follow steps 1–4 under "Setting a PIN" above to go to Security key, then click Manage.
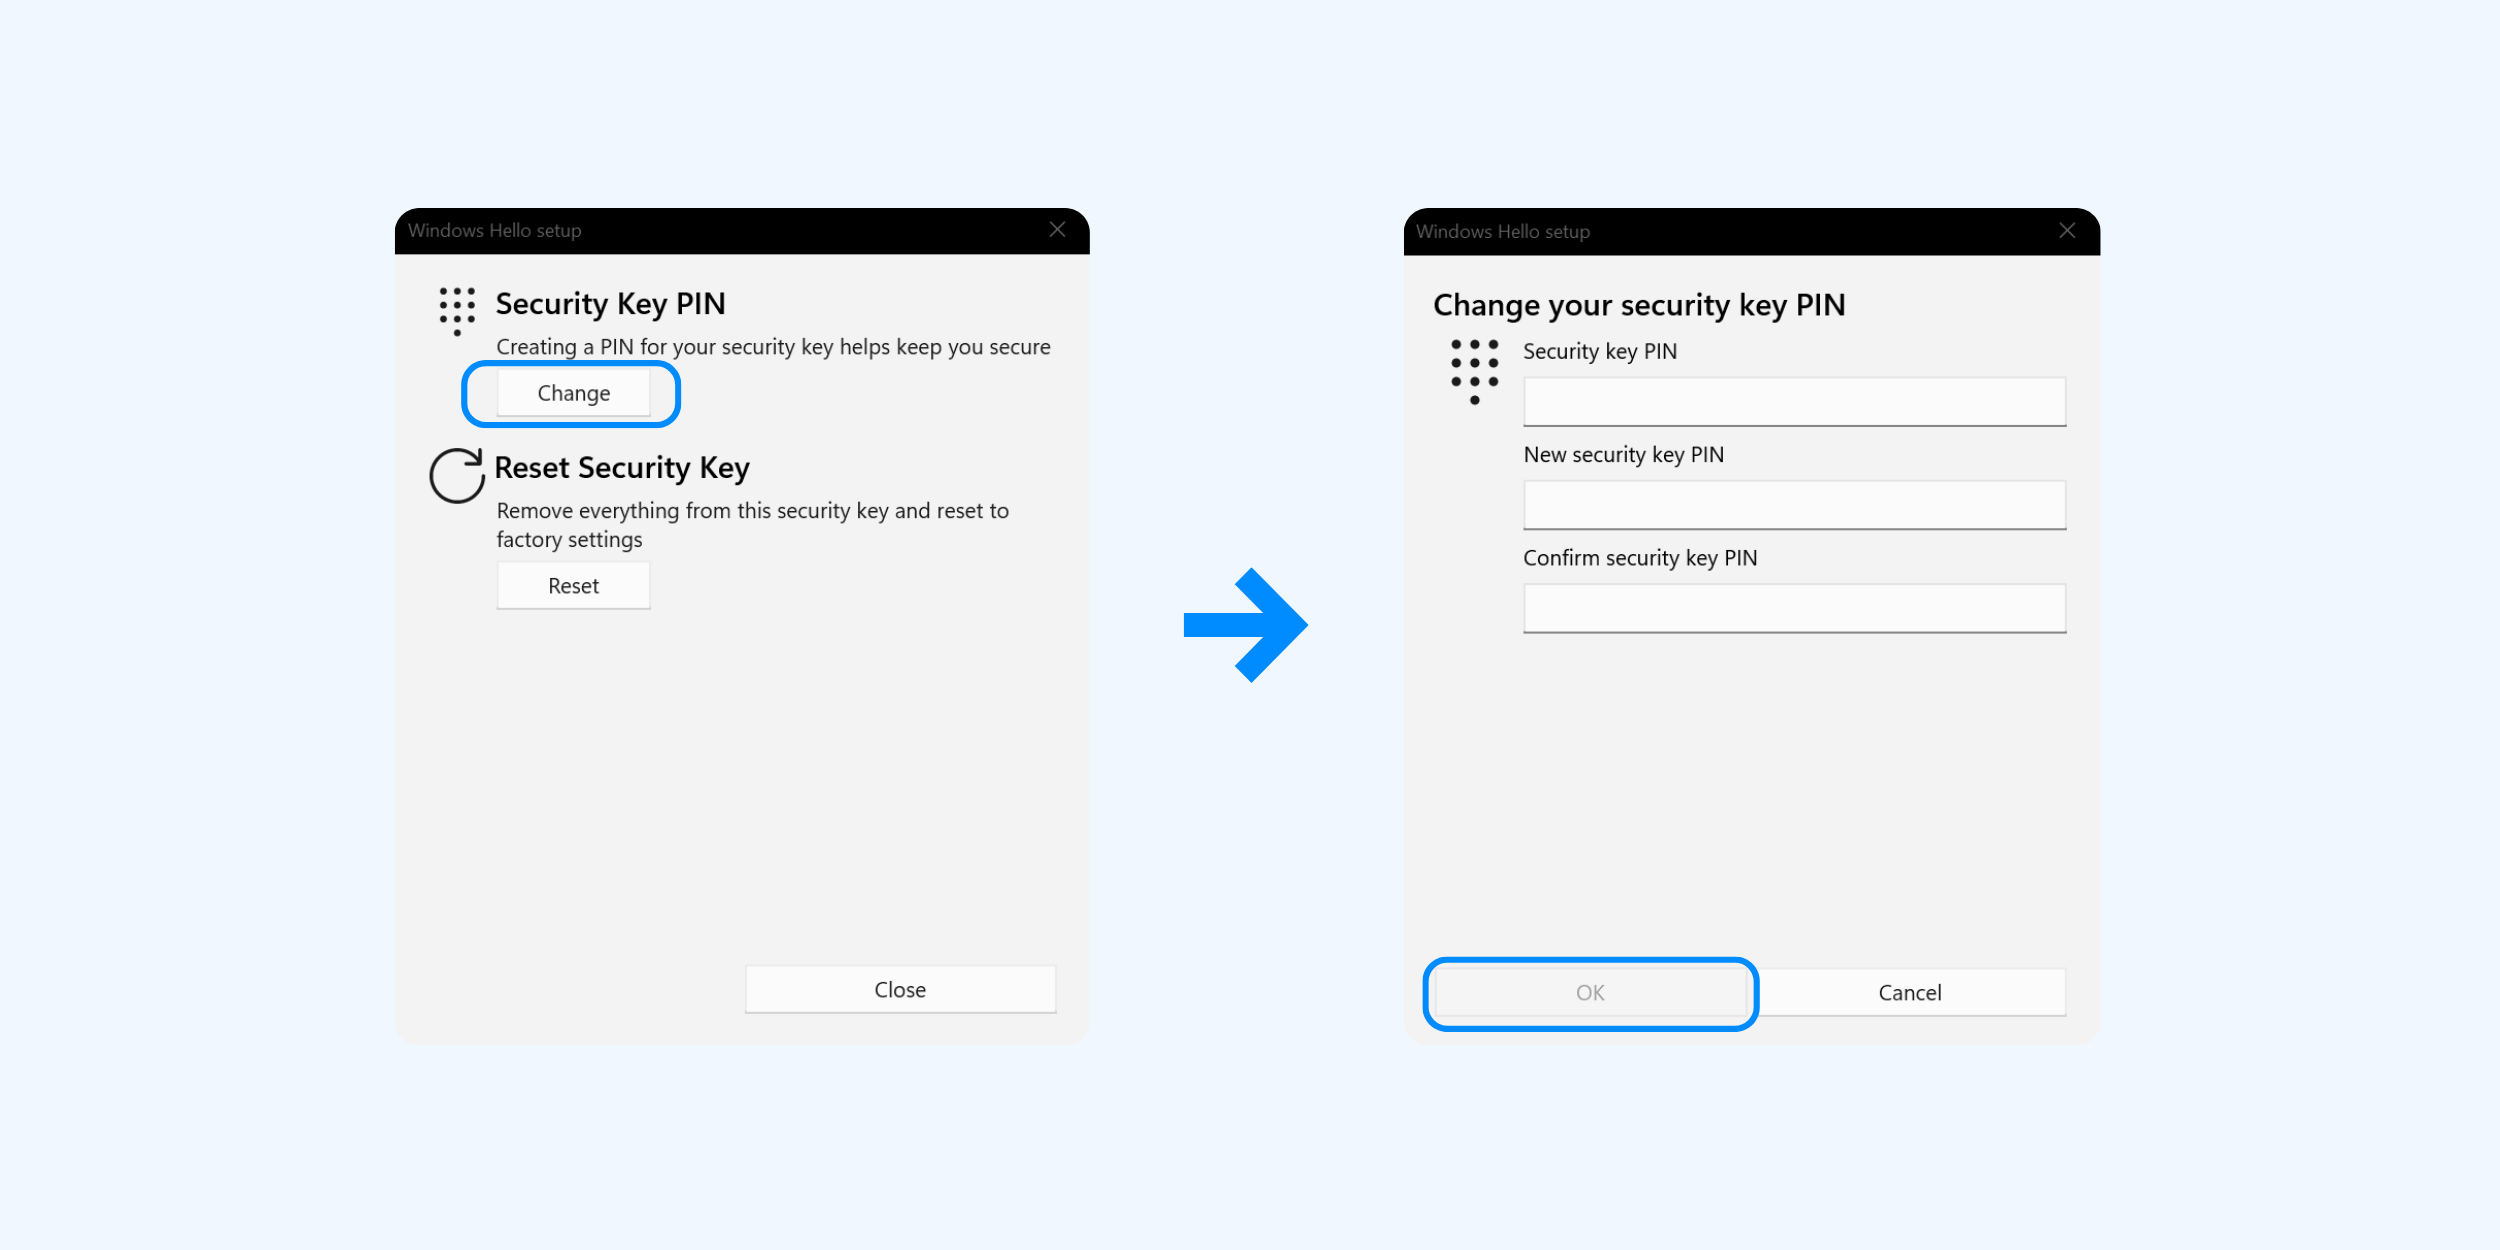
- Click the Change button under Security key PIN.
- Enter your current PIN ▸ enter your new PIN ▸ click OK to finish.
Resetting Your PIN
- Follow steps 1–4 under "Setting a PIN" above to go to Security key, then click Manage.
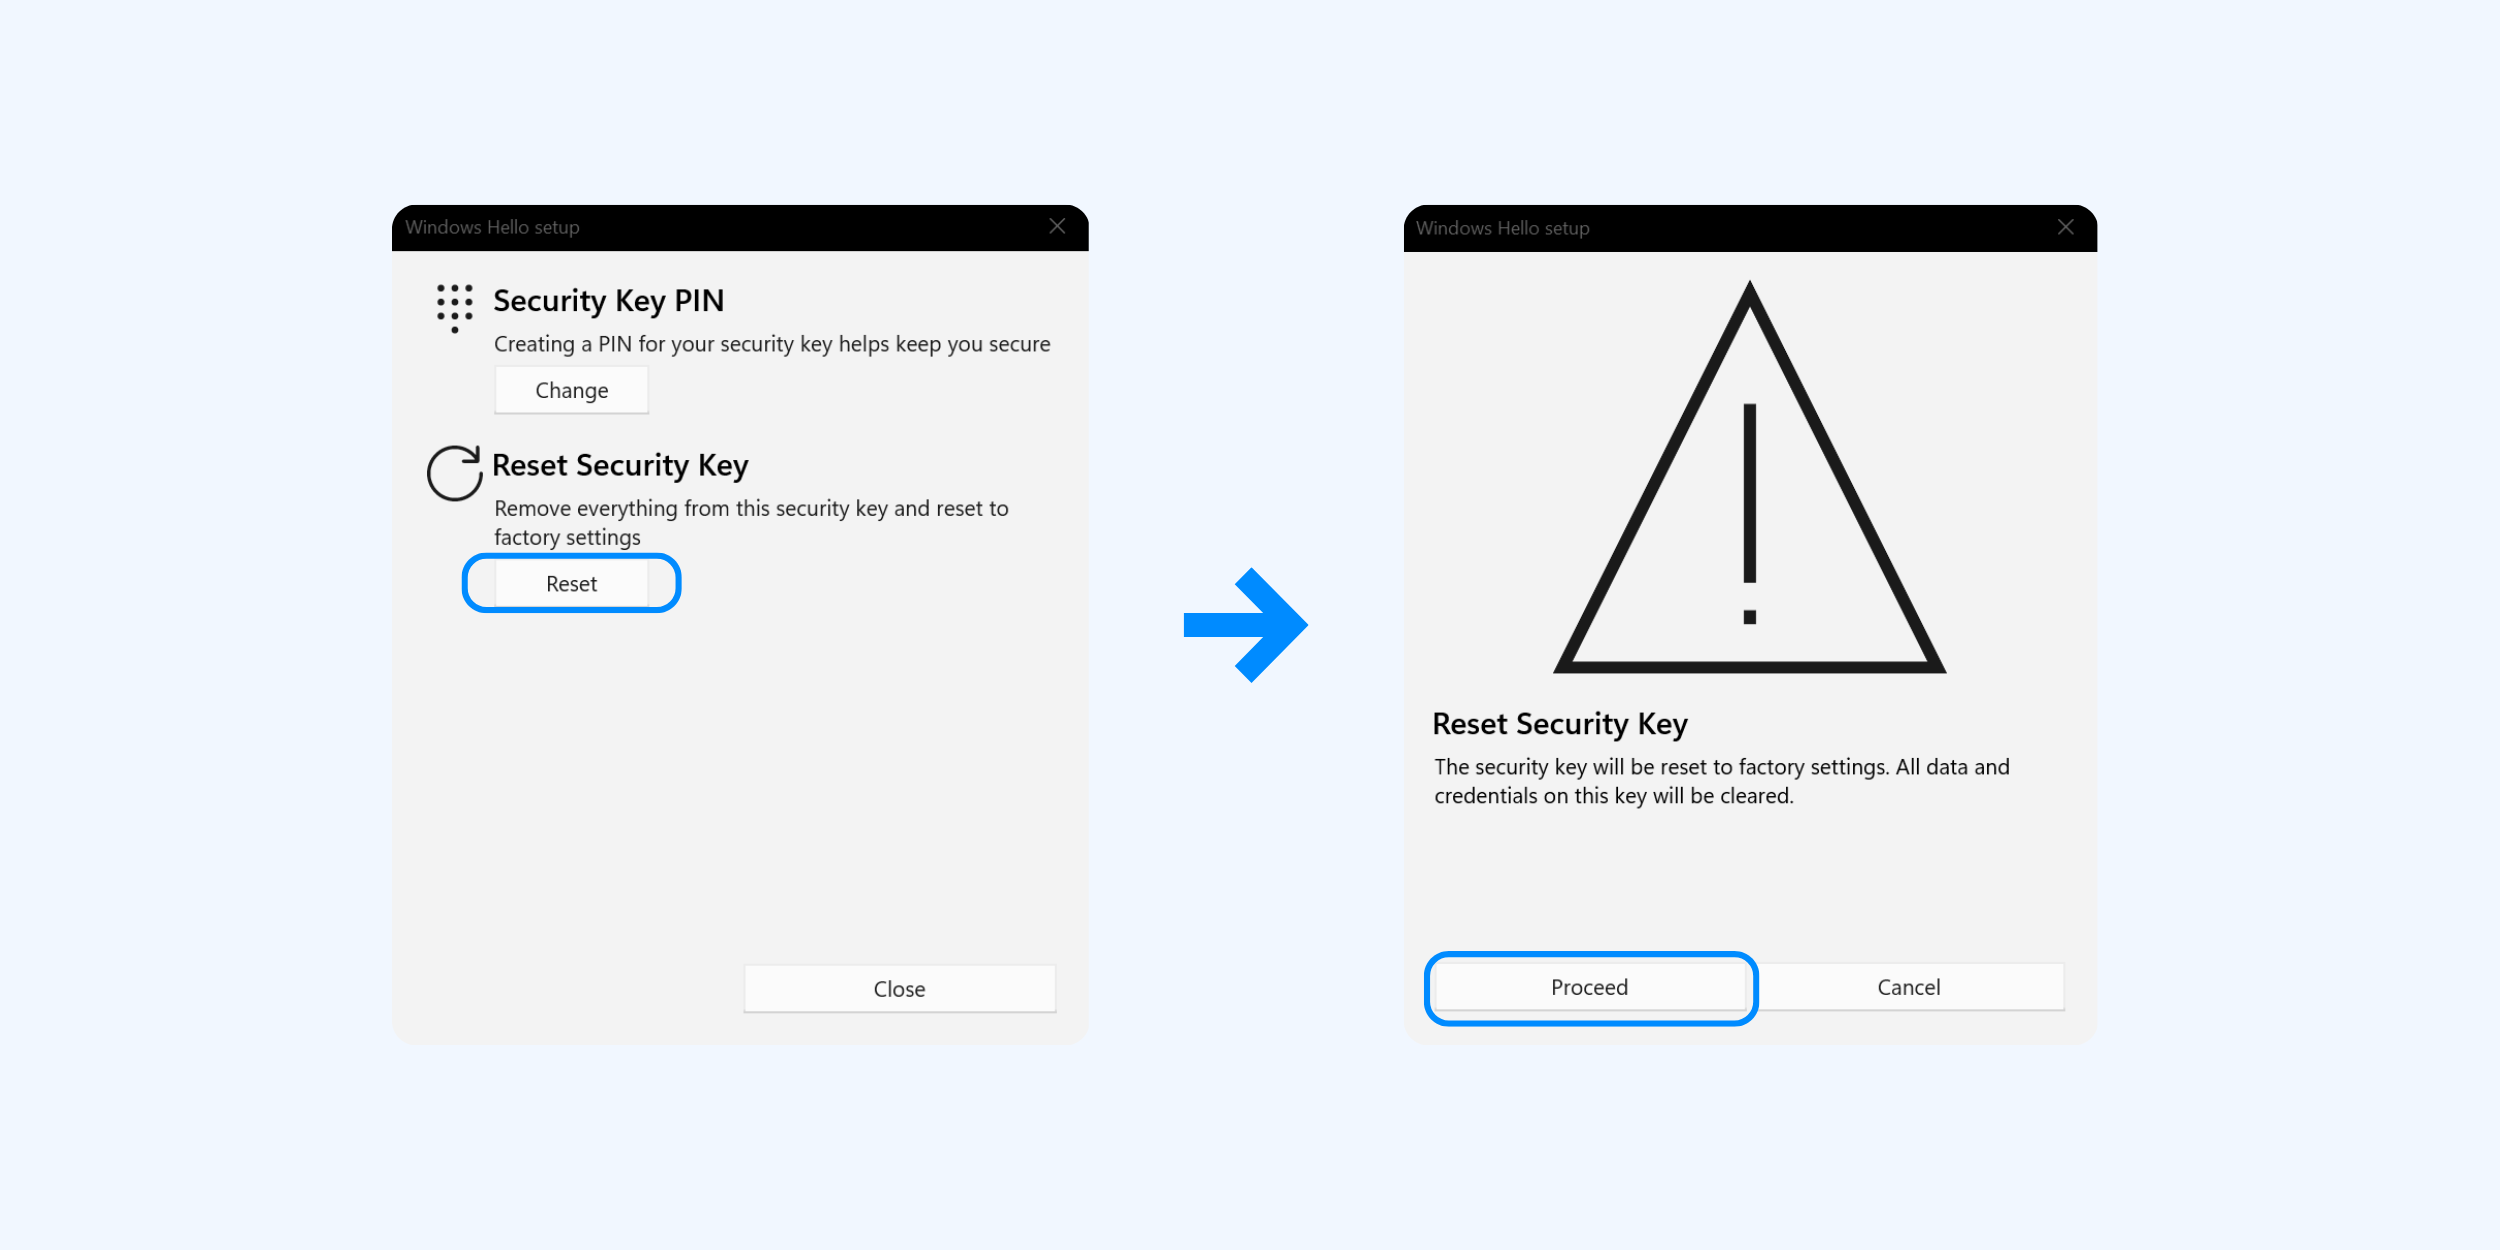
- Click Reset under Security key PIN ▸ then Continue.
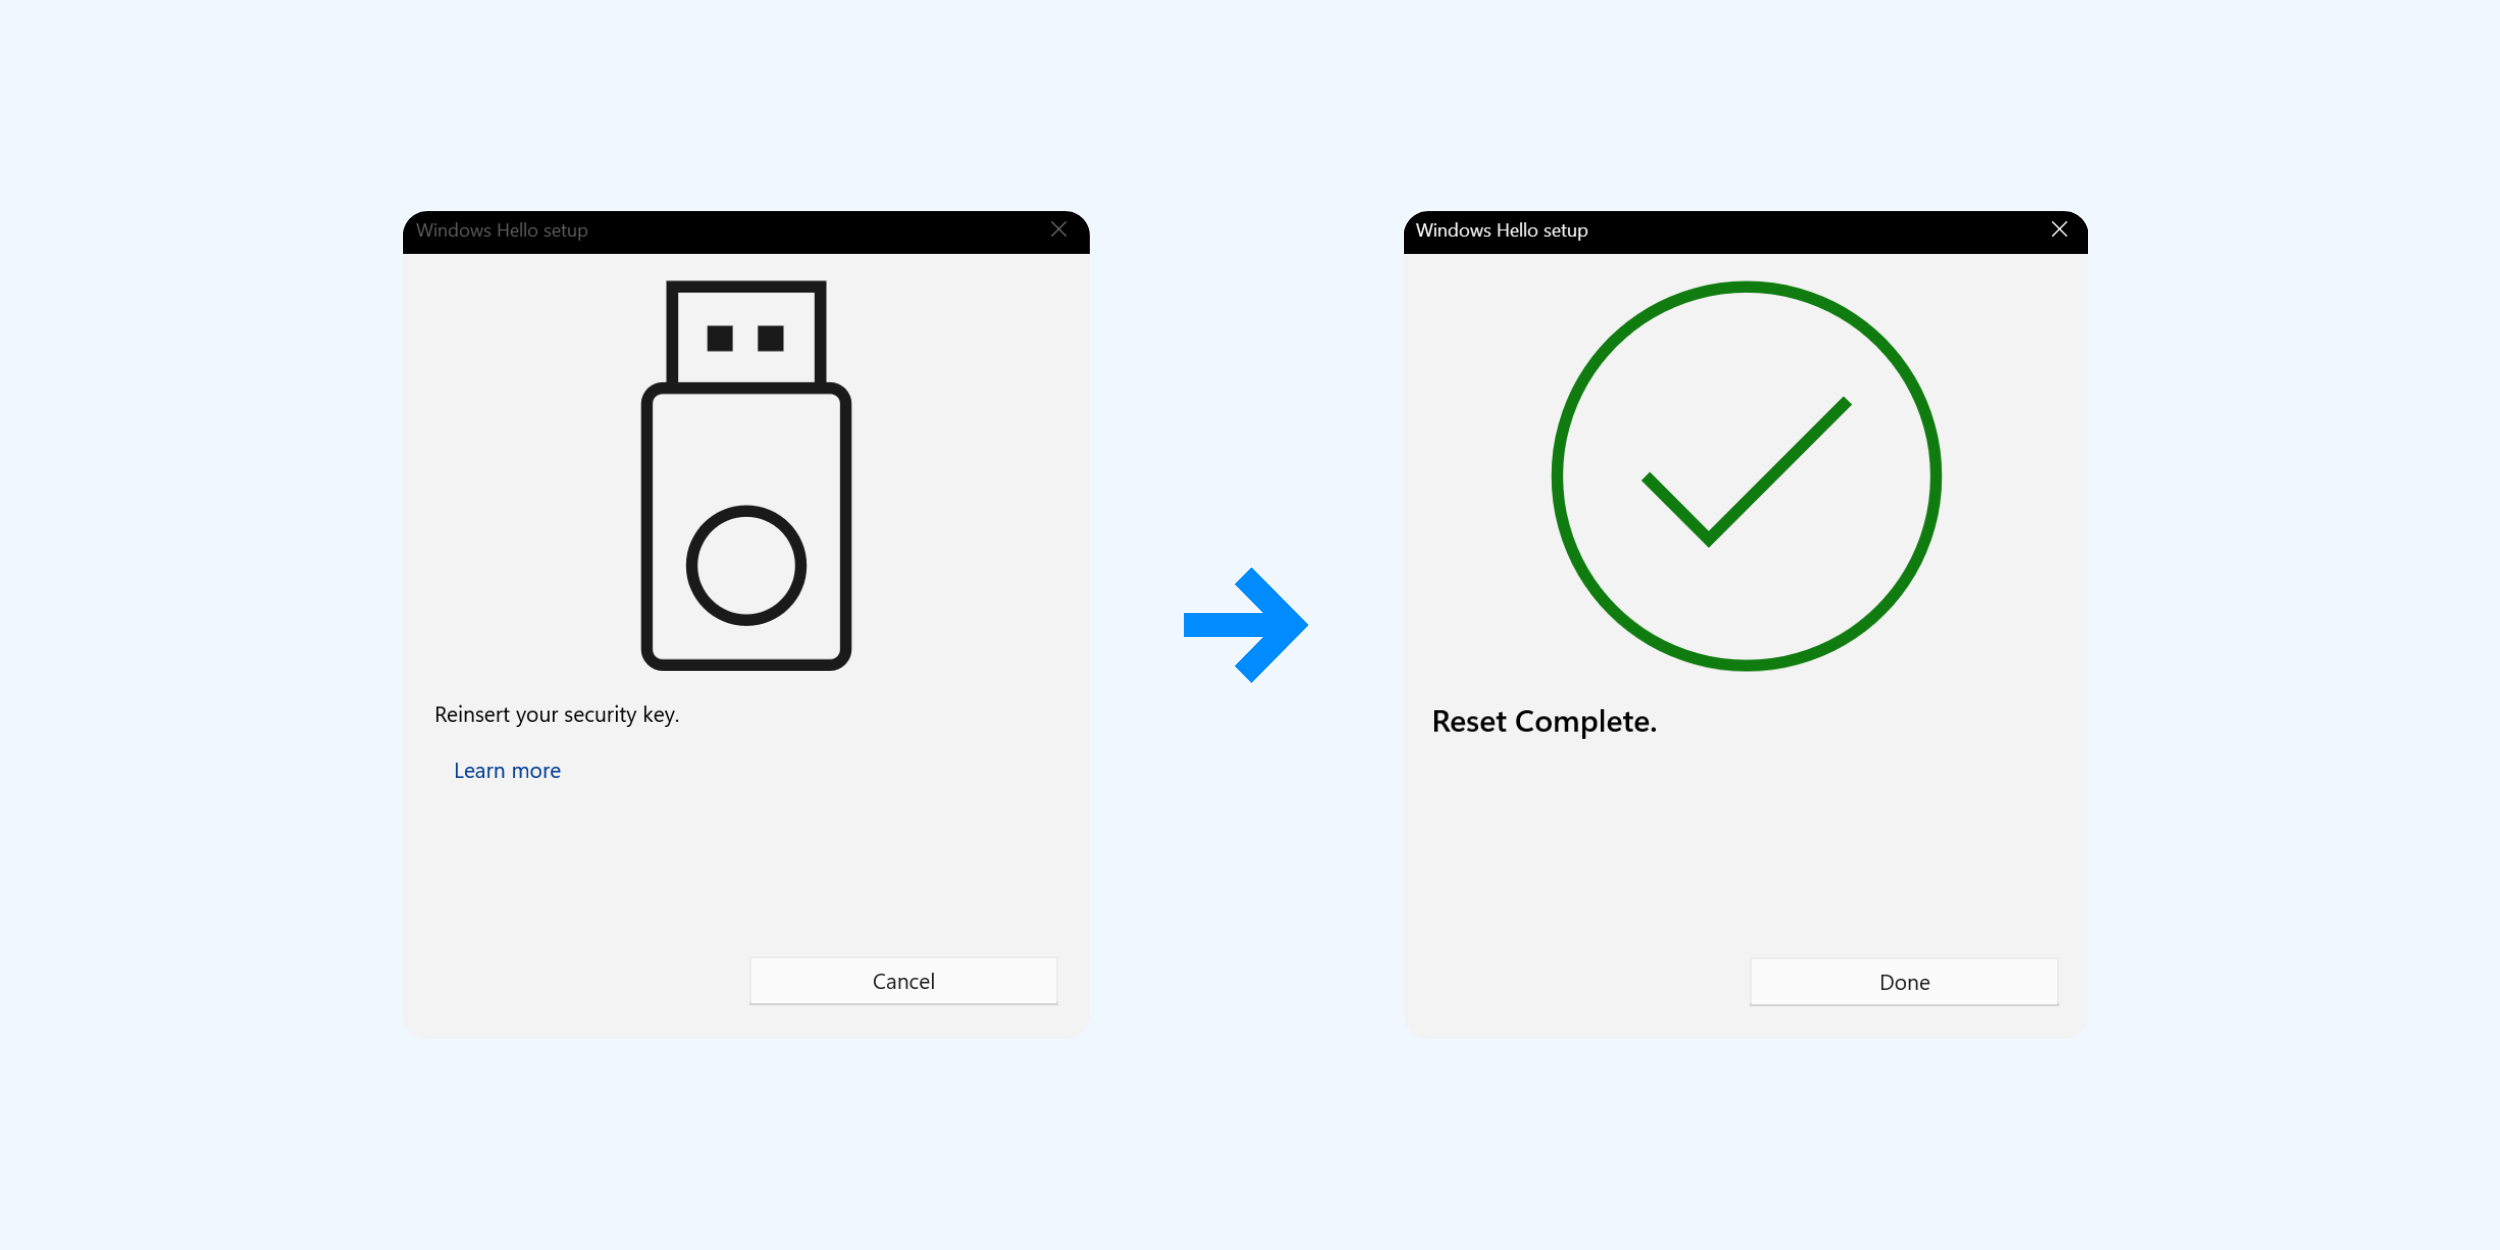
3. Re-insert your security key ▸ touch the key when prompted ▸ click Done.
* Important Notes *
- Be sure to remember the PIN you set.
- Once your ATLKey Lite is locked, it must be reset before it can be used again.
- The exact number of allowed attempts may vary slightly depending on your operating system or platform.
- After a reset, all registered accounts and data on the ATLKey Lite will be erased and cannot be recovered.
The system will ask you to unplug and re-insert your ATLKey Lite.
The system will require you to enter your recovery phrase (also called a security challenge phrase) to continue.
After entering the recovery phrase, one more incorrect PIN entry will permanently lock the ATLKey.